EVS Frame Kit
It can take as little as 10 minutes to install a EVS Glazing panel, compared to over three hours to retro glaze a traditional double glazing panel

It can take as little as 10 minutes to install a EVS Glazing panel, compared to over three hours to retro glaze a traditional double glazing panel

EVS installation is very simple and quick and provides huge satisfaction to those that do it them selves. Tradiational Retro glazing requires a high level of skill, specialised tools, takes a lot of time, and can leave a lot of damage especially to fragile lead lights, timberwork, and paint. It takes less then an hour to install an EVS panel and most of that time is spent on cleaning and preparing the paintwork around the existing window. DIY customers simply need to measure their glass size and email photos and sizes to EVS. The windows are manufactured and sent ready to install.
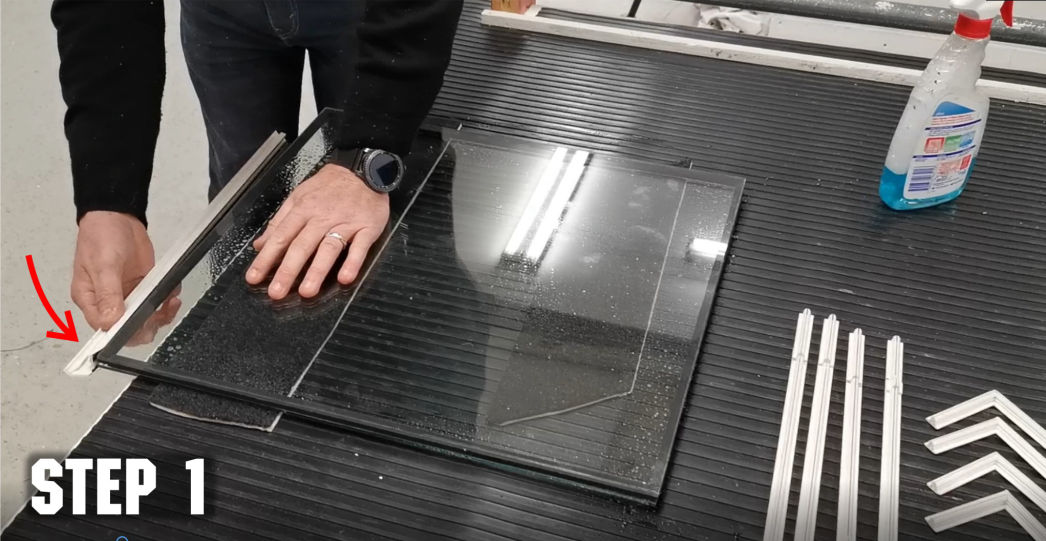
Prepare your working area so the glass won't scratch or get damaged from moving it around. You can use old carpet scraps to allow it to move. Spray with detergent around the edges to make it easier to clip the side profiles along each edge. The profiles are designed to fit tightly so you need to apply pressure to pull back the flap edge and get one end on then move along the length by pushing the rest on firmly.
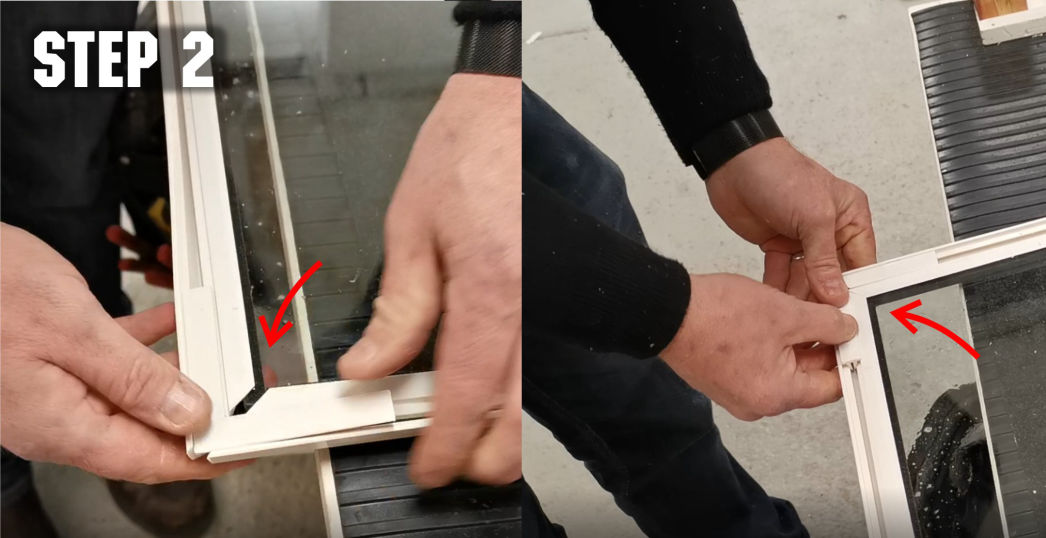
Step 2: There are four corner locking clips that you press into place on each corner. you will see them click into a flush position when they are correctly seated. Push the corners together as tightly as possible. There is an option (not shown) to add a locking screw that will prevent the corner from moving up after you have clicked in place. This can be recommended on larger panels.
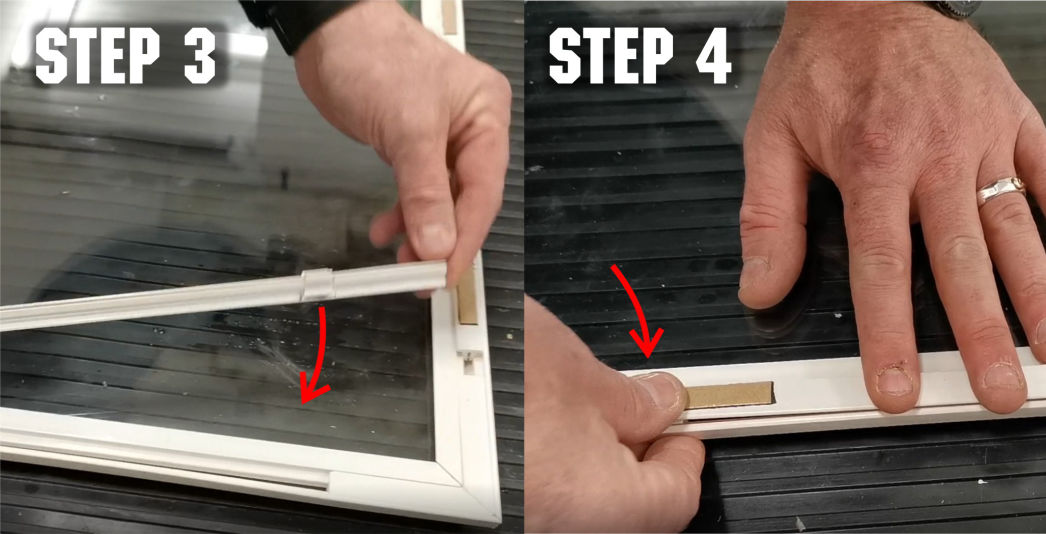
Step 3: The mounting clips come with small seated packer clips that are designed to come off when positioning the panel in place, Position this into the profile edge frames;
Step 4: Press firmly over the packer clips until you feel them clip into place.
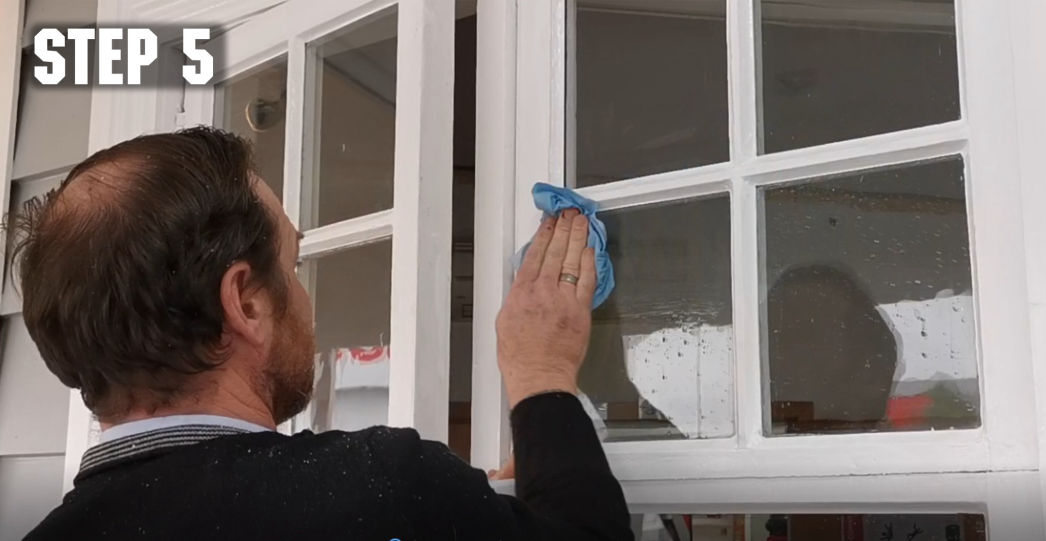
Step 5: Prepare your window, ready for the new EVS unit. This may require repair and painting of the old putty edges, you can get extra information about preparing old frames from our EVS Glazing website. The most important thing is making sure you clean the glass so that it doesn't have dust or streaks. Check from the inside as well as sometimes you can't see things from the outside.

The EVS Step–by-Step guide, how to refurbish old timber windows back to new. Fast, simple and affordable!
Some people would think that old windows with putty falling out, a bit of rot and paint flaking off is the end of the road for old character windows, and it would be better to replace them with new aluminum windows. Before you go down that path, think of the pros and cons of installing replacement aluminum over restoring your existing timber frames with EVS.
The advantage of aluminum or PVC window replacement is that they don’t need painted and they won’t rot, the disadvantage is the extra cost and the loss of character, which could devalue your home.
The advantage of keeping your timber windows getting better insulation performance, maintaining your homes character, getting extra weather protection, and spending a lot less money. DIY improvements to your windows can provide you with a professional results while saving you even more cost.
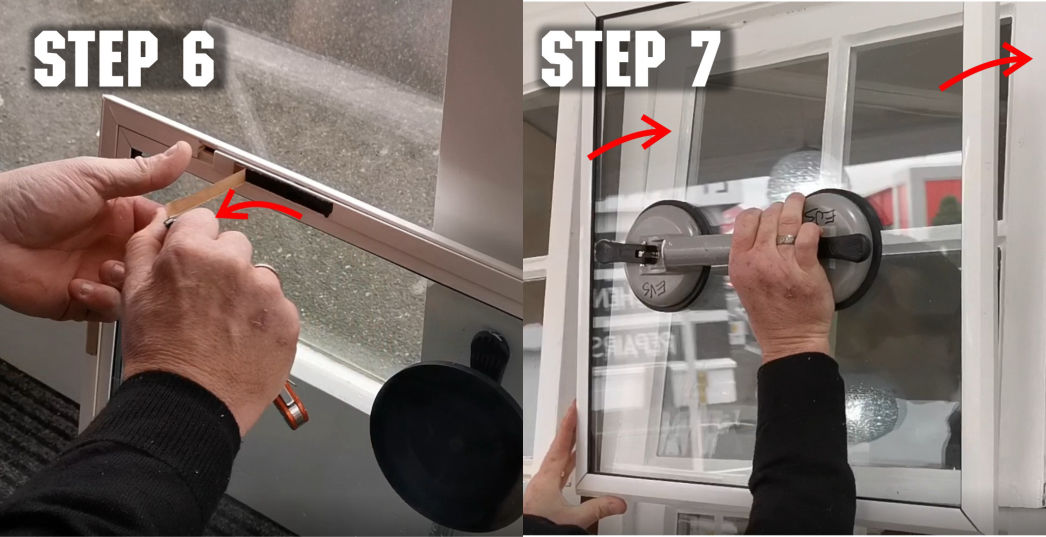
Step 6: Attach a glaziers suction pad to the outside of your panel so it is easier to handle, then remove the backing paper from your mounting strips
Step 7: Ensure the frame is dust free and dry before you gently position your panel onto the correct location. Be careful not to press it too hard until you have checked it is sitting in the correct location. You can preposition and mark your points before you remove the backing tape so to help you line them up more accurately.
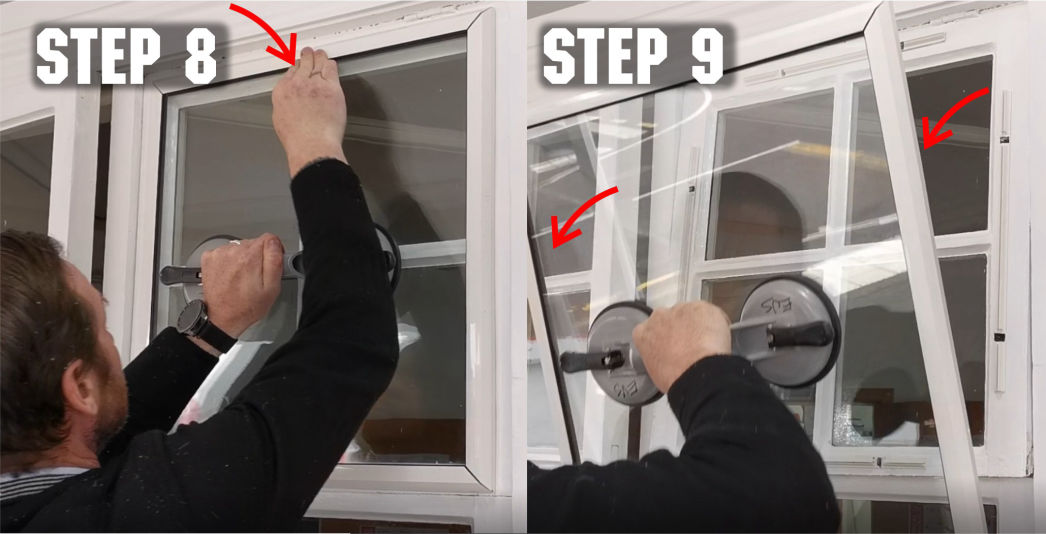
Step 8: Firmly push along each edge to allow the backing tape to adhere to the window frame.
Step 9: Firmly pull back on the glazing suction cup and lift off the panel leaving behind the mounting clips. The packer clips will be still set in the back of the frame which will need to be removed before you reattach the panel. Use a nail to flick out the packer blocks.
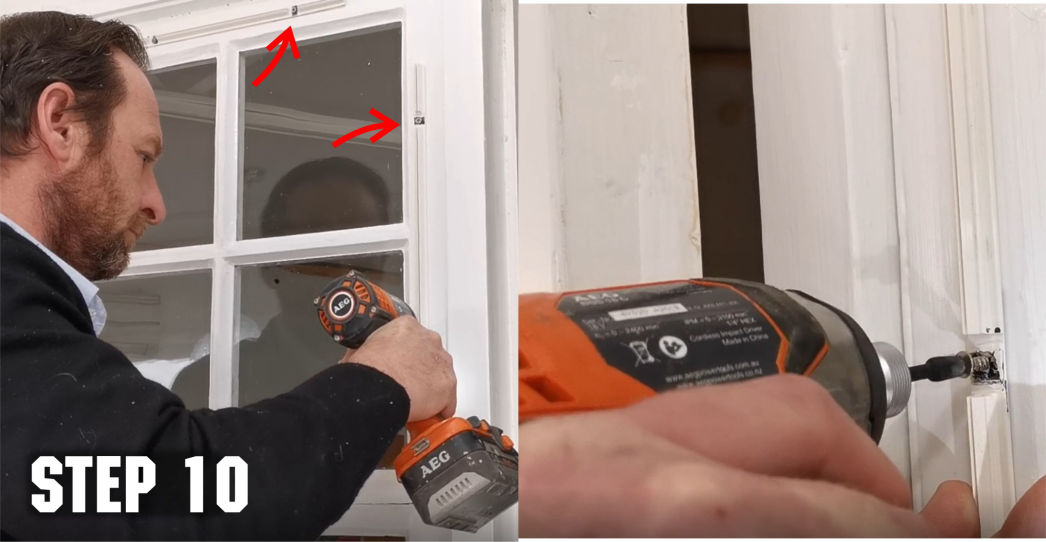
Step 10: The mounting clips have pre-drilled holes ready to have a small screw attached in each location. Use a battery driver or a screwdriver to fix the mounting clips. Be careful not to skew the screw or over-tighten which may cause the mounting clip to move or crack.
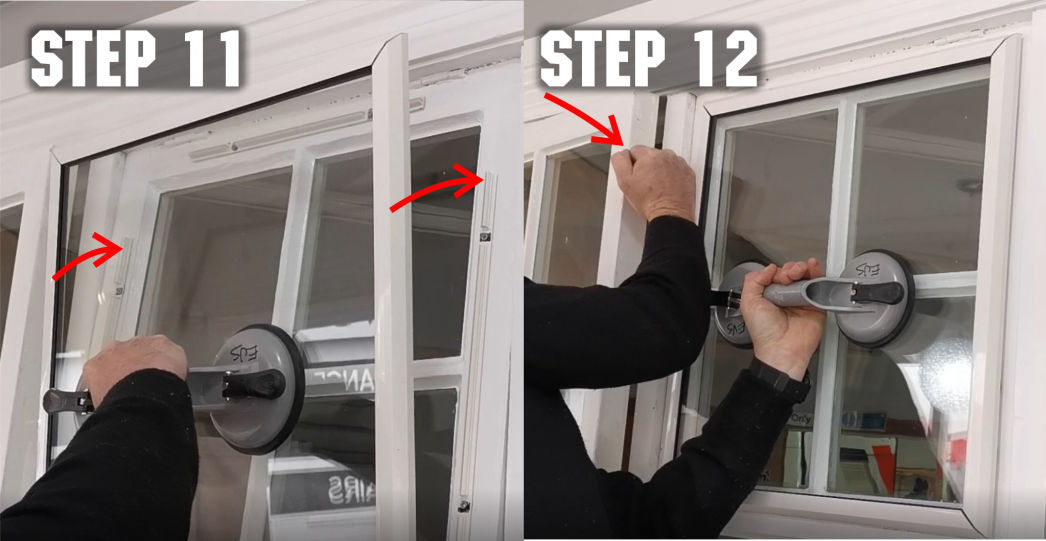
Step 11: Reposition the EVS panel back over the mounting clips.
Step 12: The Mounting clips need to click into place and require a firm push. You can use a rubber mallet to tap around the frame to seat the mounting clips onto the profile. Be careful not to hit the glass or be too aggressive and twist the frame which may cause cracks or breakages.
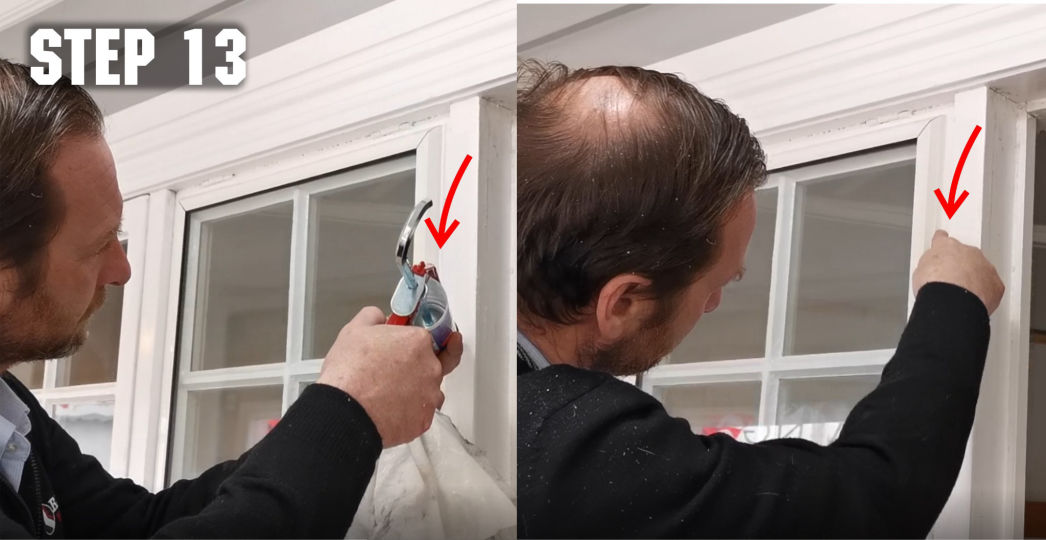
Step 13: Sealing the edges can be done using a paintable sealant, applied with a caulking gun. The best is polyurethane-based silicon that can be painted, but an exterior based gap filler can also be used. Run a good bead down each edge and finish it by smoothing it off. Be careful to leave a good radius of sealant rather than wiping it all back out, a skinny radius of sealant may crack and allow moisture into the unit. Visually check to ensure there are no small holes or gaps in the sealant.
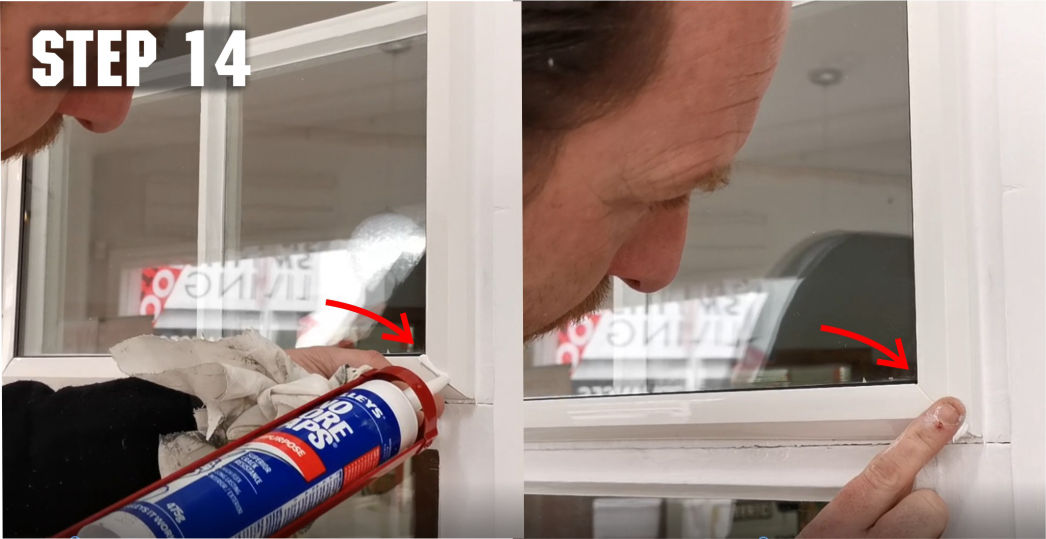
Step 14: Seal the corners. The corners are designed to have slightly arised edges and a small opening to allow for your gap seal to get right into the cavity. After filling the corner, tool it off with your finger or a spatula. Do not wipe it back out by using a cloth, this will result in too much sealant being removed which could then crack and allow moisture inside the unit. Be careful not to gap-fill the air vents or water drains.
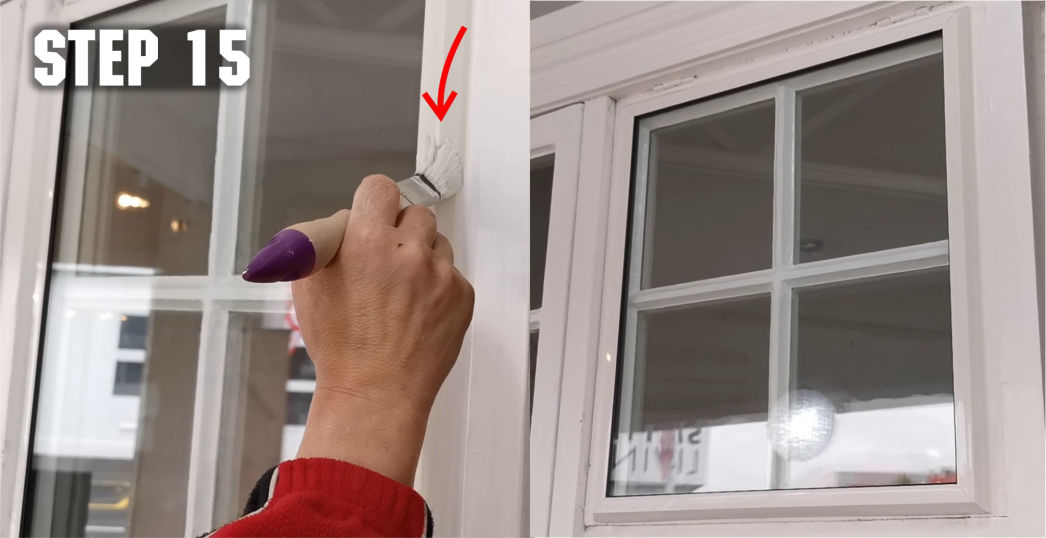
Step 15: Painting the EVS frames will visually match it back to the timber paint finish and protect the frame from long term UV damage. Contact your local paint supplier for recommendations on what paint system to use with the PVCu frames to best suit your local conditions. It will take a few days for the paint to a harden off so don't handle the units for a few days following sealing and painting.
Phone: +64 (0) 3 455 0957
Email: info@evsglazing.nz